What Is a Brand Kit? How to Make One From Your Logo
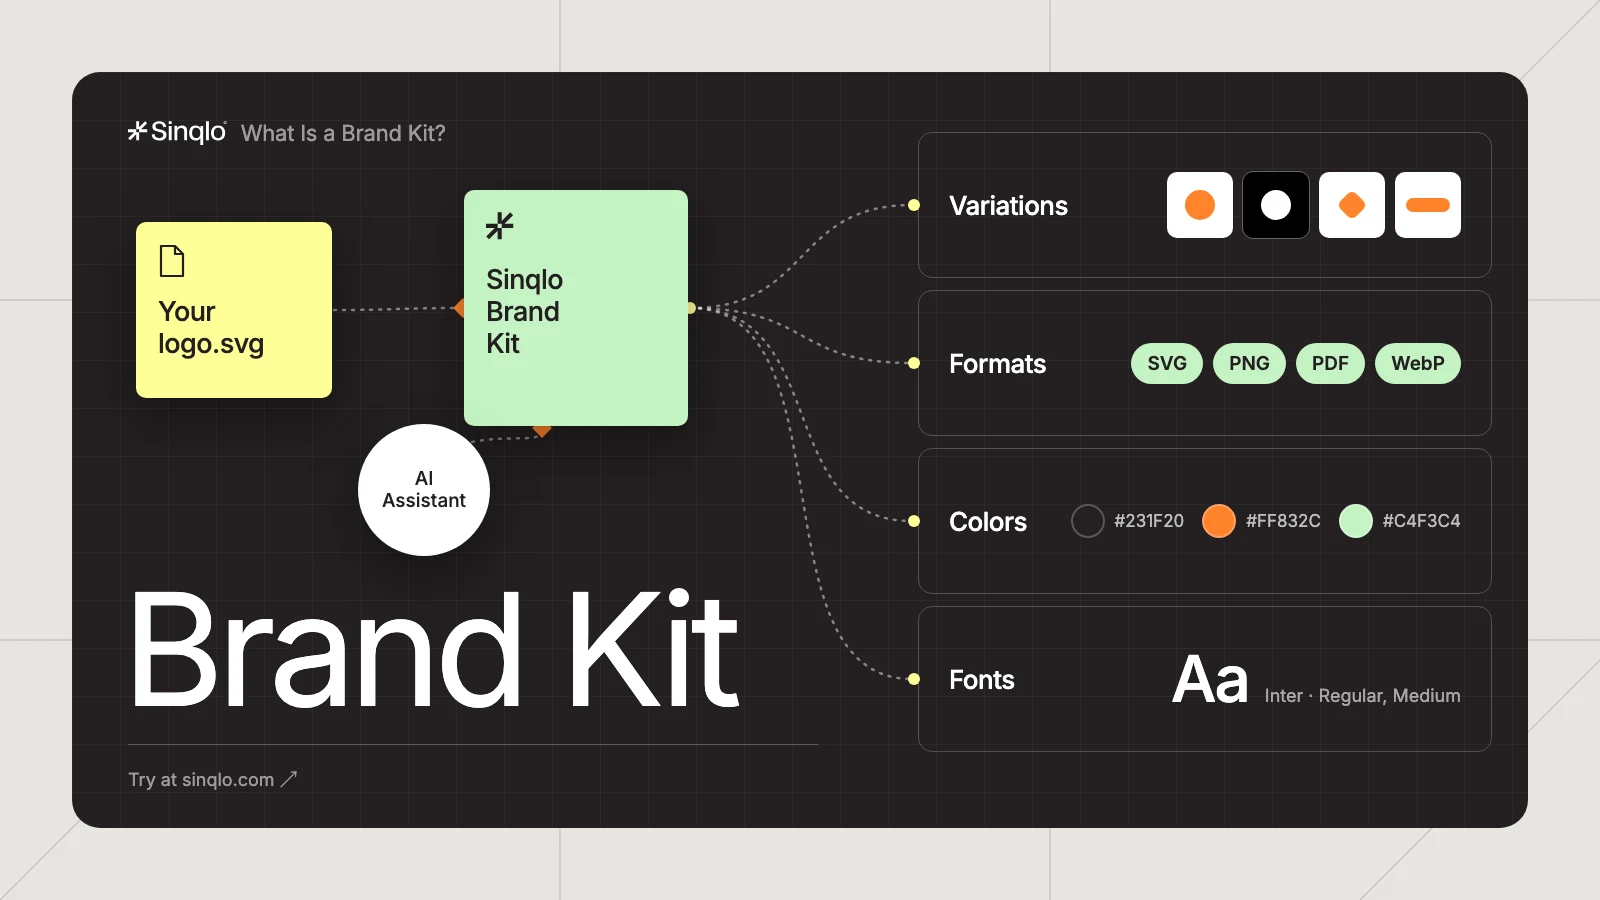
A brand kit is one place that holds everything a client needs to use their brand: every logo variation, in every file format, plus the brand colors and fonts. For a design studio, the best version isn’t a ZIP file. It’s a single link the client can open any time, which stays current when the logo changes. This guide covers what goes into a brand kit, how to build one from a logo you already have, and the delivery mistakes that turn a good brand into a support ticket.
Key takeaways
- A brand kit holds logo variations, file formats, colors, and fonts. Notes and a link to the guidelines are a nice extra.
- The kit is the assets. Brand guidelines are the rules for using them. Clients reach for the kit far more often.
- Building one by hand takes 30 to 45 minutes per client, and you redo it every time the logo changes.
- How you deliver it matters as much as what’s in it. A ZIP file is out of date the first time the logo changes. A link isn’t.
- You don’t design anything new. A good brand kit is built from the logo you already made.
What is a brand kit?
A brand kit is the complete, ready-to-use set of a brand’s visual assets, packaged so anyone (the client, their printer, their web developer, their new marketing hire) can grab the right file without asking you.
That last bit is why kits exist. A logo isn’t one file. It’s a primary version, a white version for dark backgrounds, a symbol for favicons and social avatars, a horizontal lockup for website headers. Each of those needs to exist as SVG for the web, PNG for email and slides, PDF for print, and WebP if the developer cares about page speed. Four variations times four formats is 16 files before you’ve even mentioned colors.
A brand kit turns those 16 files into something a non-designer can actually use.
What goes in a brand kit
| Element | What to include | Who uses it |
|---|---|---|
| Logo variations | Primary, inverse (white), symbol/mark only, horizontal lockup | Everyone |
| File formats | SVG, PNG (transparent), PDF, WebP for each variation | Web devs, printers, marketing |
| Colors | HEX, RGB, and CMYK values for each brand color | Web devs, printers, social teams |
| Fonts | Font names, weights, and where to get them (licensed or Google Fonts) | Anyone designing with the brand |
| Notes | Clear space, minimum size, “don’t stretch the logo” | Whoever’s about to stretch the logo |
| Links | Full brand guidelines, social profiles, website | The client’s wider team |
If you only have time for the first four rows, that’s still a working brand kit. The notes and links are what make it feel finished.
Not sure which format goes where? We broke that down in SVG vs PNG: when to use each format.
Brand kit vs. brand guidelines
People mix these up constantly, and it shows at handoff.
Brand guidelines are the rulebook: spacing, minimum sizes, typography hierarchy, tone of voice, the “do and don’t” pages. They’re usually a PDF somewhere between 20 and 60 pages long.
A brand kit is the toolbox: the actual files, colors, and fonts.
Your client’s team opens the guidelines once, maybe. They need the brand kit every week, every time someone builds a slide deck, updates the website, or sends a file to a printer. That’s why the kit has to be easy to reach. A guideline PDF buried in an inbox is annoying. A logo nobody can find is a support ticket that lands on you.
How studios usually deliver a brand kit (and why it breaks)
Most studios still deliver brand kits the same way:
Export 16 files. Rename them. Zip them. Upload to Google Drive. Email the link. Client asks for the white version. You resend it. The logo gets a small revision. Do it all again.
It works the first time. Then it slowly falls apart:
- ZIP files don’t update. The day you revise the logo, every copy you’ve sent is out of date, and you have no idea how many copies are out there.
- Drive links drift. Folders get moved, permissions change, someone downloads “logo_final_v3_USE-THIS.png” from a two-year-old thread.
- Every request lands on you. “Can you resend the PNG?” is a five-minute task that breaks a two-hour focus block.
What that looked like in our own studio
Before Sinqlo, iframe design studio ran exactly this workflow. Every client got a ZIP file, then a Google Drive link, then a follow-up email with the one file they couldn’t find. It was total chaos. Nobody on the team knew which version was current, and a big part of every week went to resending files that had already been sent.
When we moved our client brand kits to live links, we saved about 3 hours a day across the whole team on exporting, resending, and answering “which logo do I use?” emails. The back-and-forth with clients mostly stopped, and the team finally worked from the same version of every brand. We spent those hours on design work instead, which is the part clients actually pay for.
How to make a brand kit from your logo
You’ve already done the hard part: you designed the logo. Building the kit around it is mechanical work, whether you do it by hand or with a tool.
1. Start from the master file
Use the vector original (Adobe Illustrator, SVG, or PDF). A PNG works in a pinch, but every format you generate is only as sharp as the file you start from.
2. Create the variations
At minimum: primary (full color), inverse (white, for dark backgrounds), and a symbol-only version. Add a horizontal or stacked lockup if the logo has a wordmark.
3. Export every format
SVG, transparent PNG (at a couple of sizes), PDF, and WebP, for each variation. By hand, this is where most of the 30 to 45 minutes goes.
4. Record colors and fonts
Write down the HEX, RGB, and CMYK values. List the fonts, weights, and where to get them. Don’t send licensed font files the client hasn’t bought a license for.
5. Package it so the client can find it
This step decides whether anyone uses the kit. A folder name like Northwind_BrandKit_FINAL.zip is a guess about what the client will need. A sharing page they can open and browse is not.
The faster route: a brand kit generator
A brand kit generator does steps 2 through 5 for you, starting from the logo you already designed. It doesn’t create a new brand. It builds the kit around the one you made.
In Sinqlo, you upload the logo once (Adobe Illustrator, PDF, SVG, PNG, or JPG). The AI Assistant creates the variations and detects the brand colors. Every variation is exported automatically as SVG, PNG, PDF, and WebP. You add the fonts and notes, and the whole thing becomes a Brand Kit Sharing Page: one page where the client browses and downloads everything.
You send the client one Brand Link. When the logo changes, you update it in Sinqlo and the link updates too. Nobody resends anything. If the brand needs to stay private, you can protect the page with an access code.
So your client stops collecting attachments. They open one brand kit, and it’s the current one every time. See how it works on the product page.
Brand kit checklist for client handoff
Before you send a brand kit to a client, check that:
- Every logo variation is included (primary, inverse, symbol, lockup)
- Each variation exists as SVG, PNG, PDF, and WebP
- Color values are listed in HEX, RGB, and CMYK
- Fonts are named, with weights and a source or license link
- Usage notes cover clear space and minimum size
- The client gets one place to find all of it, not an email thread
- You know how you’ll update it when the logo changes
If the last two boxes are hard to tick, the problem isn’t the kit. It’s the delivery. We wrote more on that in how to share a logo package with your client in under a minute and in our roundup of the best platforms for logo delivery.
Weighing up a bigger brand management platform instead? Here’s how a focused tool compares in Sinqlo vs Frontify.
FAQ
What should a brand kit include?
At minimum: every logo variation (primary, inverse, symbol, horizontal), each in SVG, PNG, PDF, and WebP, plus the brand colors with HEX and RGB values and the brand fonts with weights. Usage notes and links to the full guidelines are a strong addition.
What is the difference between a brand kit and brand guidelines?
A brand kit is the set of assets you use: logo files, colors, and fonts. Brand guidelines are the rules for using them: spacing, minimum sizes, tone of voice, and what not to do. The kit is the toolbox, the guidelines are the manual.
How long does it take to make a brand kit?
Done by hand, exporting every variation in every format, naming the files, and packaging them usually takes 30 to 45 minutes per client. With a brand kit generator that works from your existing logo, it takes a few minutes.
Can I make a brand kit for free?
Yes. Sinqlo’s Free plan covers up to 3 logos, with automatic SVG, PNG, PDF, and WebP exports and client access codes. The AI Assistant comes with the paid plans.
Give every client a brand kit that stays current
Upload a logo you’ve already made and see the brand kit your client would get: every variation, every format, one link. Start free.